
I suppose you have installed emacs and gams-mode for emacs (if not see my preceding posts) and now are eager to start working on your model.
Let us start simple and get a model from the Gams-library. If you started emacs you are not in gams-mode (you can check this by looking at the menu bar: there is no gams-entry). If you load a gams model (with the extension “gms”), Emacs automatically turns on gams-mode and the gams entry appears in the menu bar (blue arrow). The first thing you probably notice is the syntax coloring. The coloring you will see might slightly differ from what you see in the picture. Gams-mode is highly adjustable and I changed some of the settings for syntax coloring. All gams keywords are bold blue, the comments in a $ontext-$offtext block are green, etc.
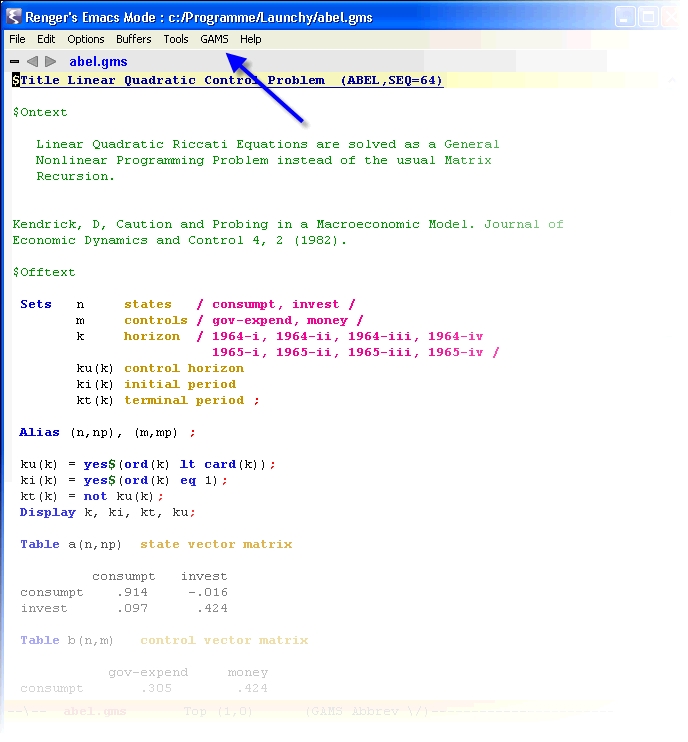
This feature is of great help: if you are writing your code and mistype a keyword it doesn’t get colored and you know that mistyped something. In the picture you see that I mistyped “Table”. Compare it to the picture above and you see the difference.

If you don’t like the default syntax coloring (like I did), you can change the settings easily: go to the menu entry “Customize Gams Mode for Emacs“. Emacs now opens a new buffer with all the settings for Gams mode. Go to the end of the buffer to the group “Gams Faces” and click on the button “Go to Group“. The first setting you will see is the one for coloring comments. The green arrow shows you how comments will appear (green). Now click on the button “Show Face“. There are many options that can be adjusted.
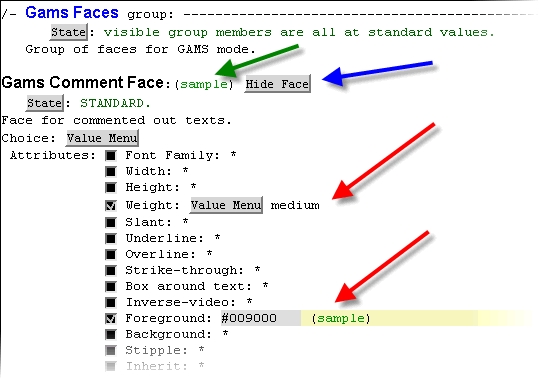
I usually adjust only two of them: “Weight” (bold, normal, etc) and “Foreground”, the color. For the weight property you can choose from a drop down menu. For the color property you can either enter the Hexadecimal Color Code or just use the plain names for colors (green, red, etc.). Here is a site that shows you the hexadecimal color codes (http://www.december.com/html/spec/colorhslhex6.html#66).
If you are finished adjusting the settings, you finally have to save them. Scroll up to the beginning of the buffer and set the new settings for the current session and save them for future sessions.
